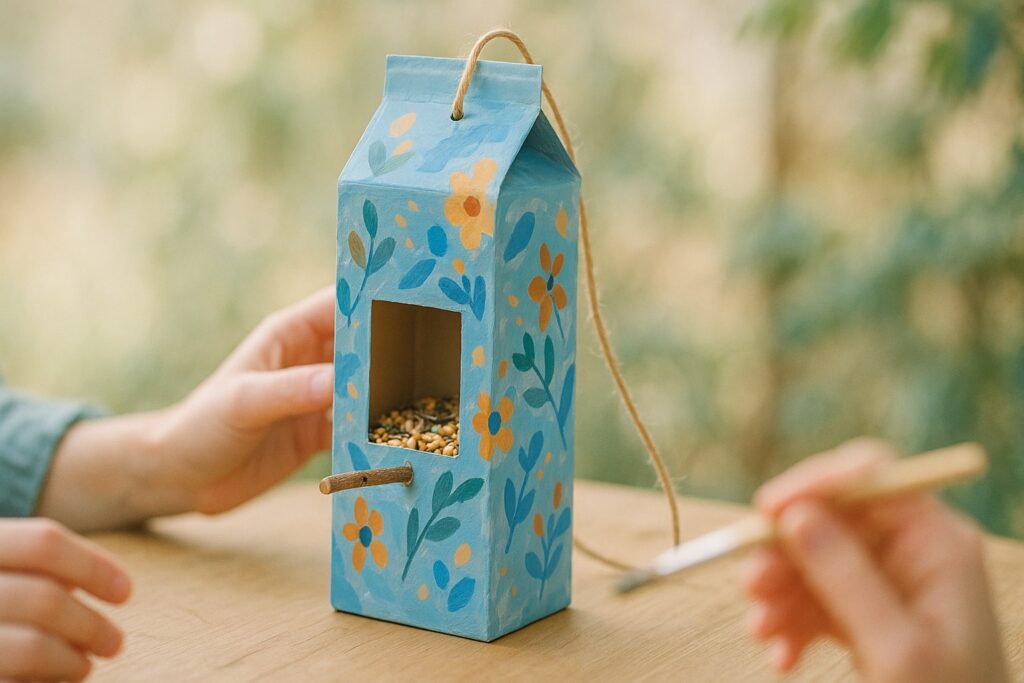
Who knew an empty milk carton could turn into the perfect birdhouse? With just a little creativity, you can transform recyclables into cozy feeders for backyard birds. This project is perfect for kids and families who love combining art, nature, and a touch of DIY magic.
From painting bold designs to attaching twig perches, every step of crafting these milk carton birdhouses offers a chance to explore creativity while reusing materials. So, let’s roll up our sleeves, repurpose those cartons, and invite some feathered friends into your yard. It’s time to create, connect, and enjoy nature together!
Materials
To get started, gather these materials:
- Milk cartons (cleaned and dried)
- Paint: Acrylic or tempera paints in your favorite colors
- Twigs or craft sticks for perches
- Decorations: Stickers or painted designs
- Tools: Scissors, utility knife, paintbrushes, and hot glue gun
- Optional: Clear sealer spray for weatherproofing
Feel free to adapt with materials you have on hand. This project is about creativity and using what you already have to create a memorable kids’ nature art experience!


Instructions
1. Prepare Your Milk Carton
Thoroughly clean and dry the milk carton. If it has a plastic spout, carefully cut it off with scissors or a utility knife to create a flat surface. Remove any stickers or labels to ensure a smooth surface for painting.
2. Cut the Entry Hole
Draw a 2-inch circle on the front of the carton using a pencil. Use a utility knife or scissors to carefully cut out the circle. This opening is perfect for small birds like wrens or songbirds to enter their new home.
3. Add a Perch
Below the entry hole, make a small X-shaped cut with the knife about 1 inch beneath the circle. Insert a twig or craft stick into the cut and secure it with hot glue. This perch provides a comfortable resting spot for the birds.
4. Create Drainage Holes
Poke small drainage holes in the bottom of the carton using scissors or a hole punch. Tip: Make sure the holes are small enough to keep the inside dry without letting birdseed to fall out. If you accidentally make the holes too large, cover them with tape and create smaller holes over the tape.
5. Paint and Decorate
Let your creativity shine! Use bright paints to cover the entire carton, and decorate it with patterns or fun designs. Consider themes like nature, seasons, or whimsical patterns. Let kids pick colors and decorations that make their milk carton birdhouses unique.
6. Weatherproof Your Birdhouse
To protect your birdhouse from the elements, spray the painted and decorated surface with a clear sealer. For extra protection, mix white glue with water and apply it to cardboard surfaces. Allow everything to dry completely before placing the birdhouse outdoors.
Optional Variations
- Upcycled Plastic Containers: Try using juice cartons or plastic jugs for a different twist. Spray paint works well for decorating plastic surfaces.
- Themed Designs: Encourage kids to create seasonal or holiday-themed milk carton birdhouses, like autumn leaves or snowy winter scenes.
- Group Birdhouse Village: Make several birdhouses and group them together to create a bird-friendly village in your backyard. This is a wonderful way to embrace family creativity and teamwork.
Benefits
Encouraging Creativity: Kids get to express themselves by designing and decorating their birdhouses, building confidence in their artistic abilities.
Learning About Nature: This project fosters curiosity about birds and the environment, encouraging mindfulness and care for wildlife through engaging kids’ nature art.
Promoting Sustainability: Repurposing milk cartons teaches kids the value of recycling and finding new uses for everyday items, making this a fantastic example of eco-crafts.
Family Bonding: Crafting together strengthens family connections and creates lasting memories through shared creativity.
Placement and Installation Tips
Find the Perfect Spot: Hang your birdhouse at least 5 feet off the ground in a shady, sheltered area. Avoid locations that are too windy or exposed to direct sunlight.
Secure It Well: Add small rocks or pebbles inside the bottom for stability. Use twine or wire to securely hang the birdhouse from a tree branch or pole.
Keep It Safe: Monitor the birdhouse regularly to ensure it remains clean, secure, and inviting for birds. Filling it with appropriate bird seed can attract more feathered visitors.
Creating milk carton birdhouses is more than just a craft — it’s a way to connect with nature, inspire creativity, and teach important lessons about caring for our planet. Watching birds enjoy the homes you’ve built adds an extra layer of joy to this project.
So, gather your supplies, unleash your imagination, and start crafting a cozy haven for your feathered friends. Don’t forget to share your creations with us at WillowKeep.art! Upload a picture of your finished birdhouse in the comments — we’d love to see your creativity in action.
Let’s celebrate creativity, connection, and a love for nature, one birdhouse at a time. 🌿